A Complete Guide: Improve Your Arduino Projects with GY-521 MPU-6050

The GY-521 MPU-6050 is a compact, affordable motion-sensing module that integrates both an accelerometer and a gyroscope, making it ideal for detecting motion and orientation in a wide range of projects. The MPU-6050 sensor is part of the GY-521 module, which is frequently used in DIY electronics, robotics, and wearable technology.  In the world of […]

What is a Door Alarm?  

A door alarm is a type of security system that sounds when a door is opened or tampered with, alerting people or property owners. For security reasons, these alarms are frequently utilized in commercial, industrial, and residential environments. The fundamental idea is to install a sensor or switch on a door so that it will […]

What is a Smart Key Door Lock?

Smart key door locks represent the latest advancement in home security technology, combining the convenience of electronic interfaces with the reliability of traditional mechanical locks. These locks offer a variety of entry methods, including biometric scans, PIN codes, and remote access via smartphone apps, elevating the standard for home security. They seamlessly integrate with smart […]

What is a Yale Smart Lock? 

Yale smart locks epitomize the cutting-edge in electronic door security, crafted by the renowned safety pioneer, Yale. These locks are engineered to offer keyless entry, enhancing the security of both residential and commercial properties. Leveraging advanced technologies such as Bluetooth, Wi-Fi, or Zigbee, Yale smart locks seamlessly integrate with smartphones, smart home ecosystems, and other […]

What is a Universal Garage Door Opener?

A universal garage door opener is a versatile device designed to work with multiple brands of garage door openers, simplifying the management of garage access. Unlike brand-specific remotes, universal garage door openers can be programmed to communicate with garage door openers from various manufacturers, including Chamberlain, LiftMaster, Craftsman, Genie, Overhead Door, Wayne Dalton, and more. […]

What’s 3-way Switch Wiring?

3-way switch wiring is a method used in electrical systems to control a single light fixture from two different locations. This type of wiring is common in areas like stairways, hallways, or large rooms with multiple entrances, offering convenience and flexibility in lighting control. How to Wire a 3-way Switch? Wiring a 3-way switch involves […]

LED Strip Light

LED strip lights are an exceptional choice for enhancing any space’s visual appeal and functionality. These versatile lighting options deliver a broad spectrum of color and brightness, making them perfect for ambient lighting in living rooms, task lighting in kitchens, or accent lighting in hallways and alcoves. The initial step in integrating LED strips into […]

 What is a Four-Way Switch?

A four-way switch is an essential component in an electrical system that enables control of a light or fixture from three or more locations. This type of switch is used in conjunction with two 3-way switches, typically in larger rooms, long hallways, or staircases where multiple switch points are practical. How to Wire a 4 […]

Uncategorized

Keep your plants healthy with EzloPi!

Uncategorized

The EzloPi smart devices provide automation through simple, customizable use with our open-source EzloPi platform, making daily life easier and improving human-machine interactions.

Before moving into this example, it is very important to know about the device registration, provisioning and converting the ESP32 device into an EzloPi device along with knowledge of Web Flasher, MiOS Mobile Application for Android/iOS and the MiOS Web Application..

1. About this example

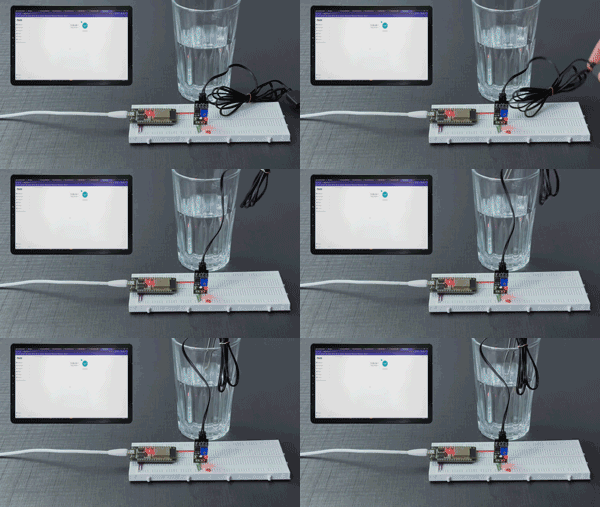
This project aims to demonstrate how we can interface the soil moisture and humidity sensor with the EzloPi device to transform the sensor into a smart device for measuring the water levels or moisture levels of the soil for optimal growth of the plants. By interfacing the sensor with the EzloPi device, we can remotely monitor the moisture levels of the soil through the MiOS user-friendly interface. This integration can allow for automated watering systems, providing an efficient and convenient way to maintain optimal soil conditions for plants.

2. Project Demonstration Video

Welcome to the project demonstration video section. The following video showcases the key aspects of How to detect the soil moisture levels using HD-38 soil moisture sensor, providing a visual walkthrough of its implementation.

3. Circuit Diagram & Interface

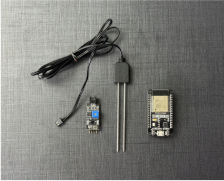
The following components are required for interfacing using the EzloPi device:

  • ESP32 as EzloPi smart device.
  • HD-38 Soil moisture and humidity sensor module.

The wiring diagram is represented as follows:
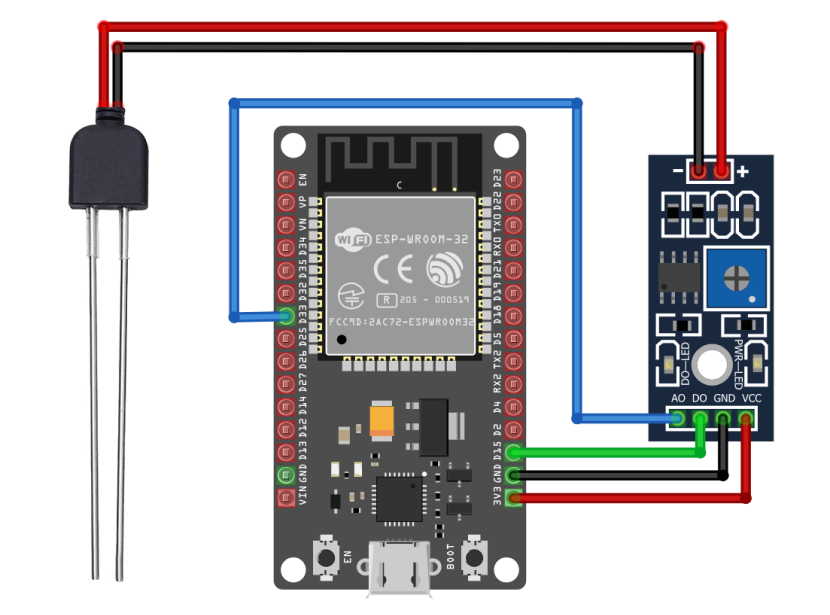
The following connections are made in order to complete the entire circuit setup:

From ESP32 to the HD-38 Soil moisture & Humidity Sensor Module:

ESP32 HD-38 module
3V3 VCC
GND GND
D15 DO
D33 AO

From ESP32 to the HD-38 Soil moisture & Humidity Sensor Module:

HD-38 module Sensor probe
+ 1st terminal
- 2nd terminal

4. Interfacing the LDR sensor module using EzloPi Web Flasher

1. Set up your device/hardware by visiting config.ezlopi.com

  1. Log in using the credentials which you just set earlier while signing up.
  1. Now, click on the Connect Device button and a pop-up window will appear.
  1. Now, select COM Port to which your ESP32 device is connected. In our case, the COM3 port is used.

Click Connect.

  1. If you are new to this and it's your first time configuring, select Create new Device ID. Enter Wifi SSID and Wifi Password.
  1. In the Device Configuration, tab click on Analog Input.
  1. A Digital Input window will open for inputting the following parameters:
  • An Analog Input window will open for inputting the following parameters:
  • Set a device name of your choosing. In our case we set it to Soil Moisture Sensor.
  • Set the Device Sub Type to Soil Moisture Sensor.
  • Set the ADC input pin to 33.
  • Then Click Apply Button.
  • After clicking the apply button you can see a table of your setting in the device configuration tab.
  • Press the Flash Device button.
  1. A window will appear on the bottom right side of the screen displaying “Please press BOOT button while flashing begins.”
  1. Hold the BOOT button down until the next window appears on the bottom right side of the screen which says “Installation prepared. Please release the boot button now.”
  1. Release the BOOT button from your ESP32 when this pop-up on the bottom right window appears.
  1. After some time, a popup will appear saying Device Flashed Successfully! This means that your device has been set up successfully.

5. MiOS App

You can download the MIOS Android app from the Google Play Store and Apple App Store.

Google PlayApple App Store

  1. After downloading the app, proceed to install the application and open it.
  1. Using the MIOS mobile application, create a new Ezlo Cloud account using the sign-up option. If you already have an account, you may proceed to log in.
  1. After successfully logging in, you will be able to see the number of controllers connected such as a lamp, fan, or any other device in the MiOS app. Tap on any controller of your desired ID:
  2. You will be able to see the status of your controller whether it is online or offline. Access the device dashboard, and tap the device. The following view of the dashboard will appear:
  1. After opening the dashboard, you will be able to see the tile of your connected device.
  1. After opening the MiOS mobile app, we can see the moisture sensor tile which shows the amount of moisture in the soil.

6. MiOS Web Application

  1. After configuring the controller with the EzloPi web flasher, head to ezlogic.mios.com
  1. Use the same credential to log in that you used for configuring the controller with the web flasher.
  1. After opening the MiOS web dashboard, we can see the moisture sensor tile which shows the amount of moisture in the soil.
Buy Components

eZlopie Products A single-channel 5V relay module $00.00

eZlopie Products Momentary switch $00.00

eZlopie Products Level Shifter Module (BSS138) $00.00

eZlopie Products ESP32
$00.00

eZlopie Products AC Lamp and Holder
$00.00

Uncategorized

The EzloPi smart devices provide automation through simple, customizable use with our open-source EzloPi platform, making daily life easier and improving human-machine interactions.

Before moving into this example, it is very important to know about the device registration, provisioning and converting the ESP32 device into an EzloPi device along with knowledge of Web Flasher, MiOS Mobile Application for Android/iOS and the MiOS Web Application.

1. About this example

The objective of this project involves interfacing an LDR sensor module with the EzloPi device for real-time light monitoring. The sensor captures ambient light and provides analog values, allowing real-time tracking of light intensity. This integration enables applications such as automated lighting control, energy efficiency optimization, or security systems based on environmental light conditions. The EzloPi device serves as a central hub for processing and managing the sensor data, offering a versatile solution for smart home, office or industrial automation setups.

2. Project Demonstration Video

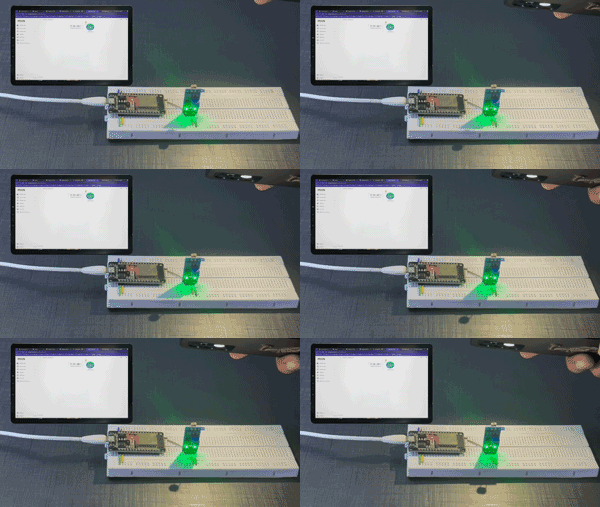
Welcome to the project demonstration video section. The following video showcases the key aspects of How to make a real time Light Monitoring with LDR Analog Sensor and EzloPi, providing a visual walkthrough of its implementation.

3. Circuit Diagram & Interface

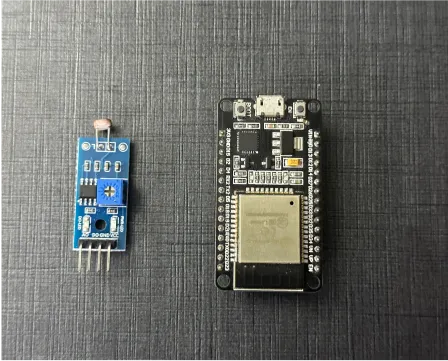
The following components are required for interfacing with the EzloPi device:

  • ESP32 as an EzloPi smart device.
  • LM393 Photoresistor module.

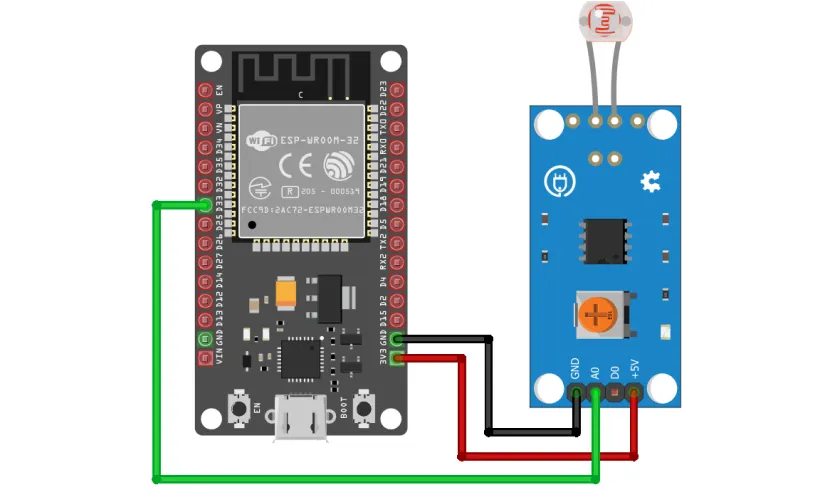
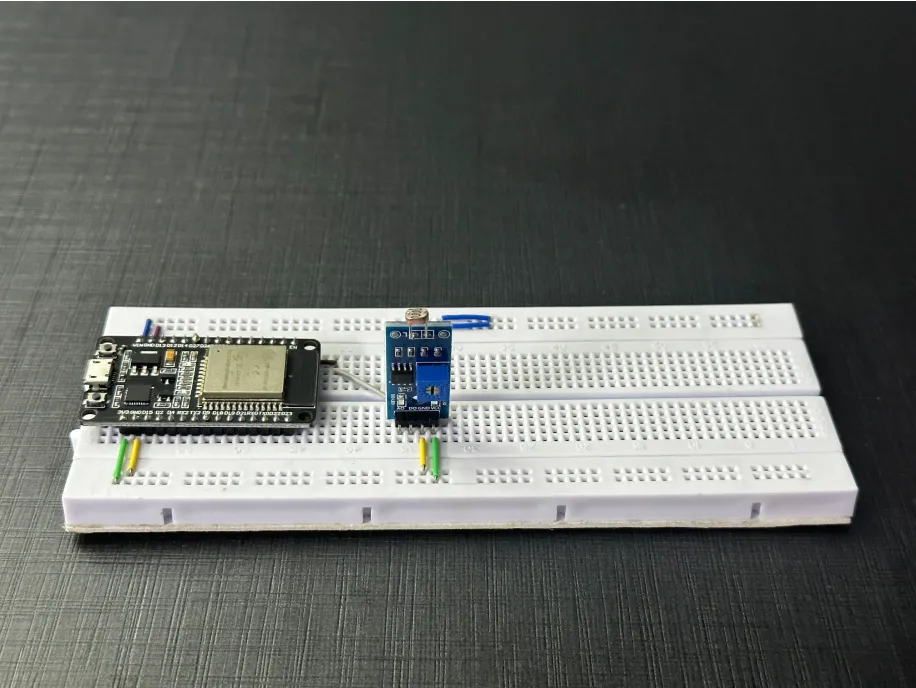
The wiring diagram is represented as follows:
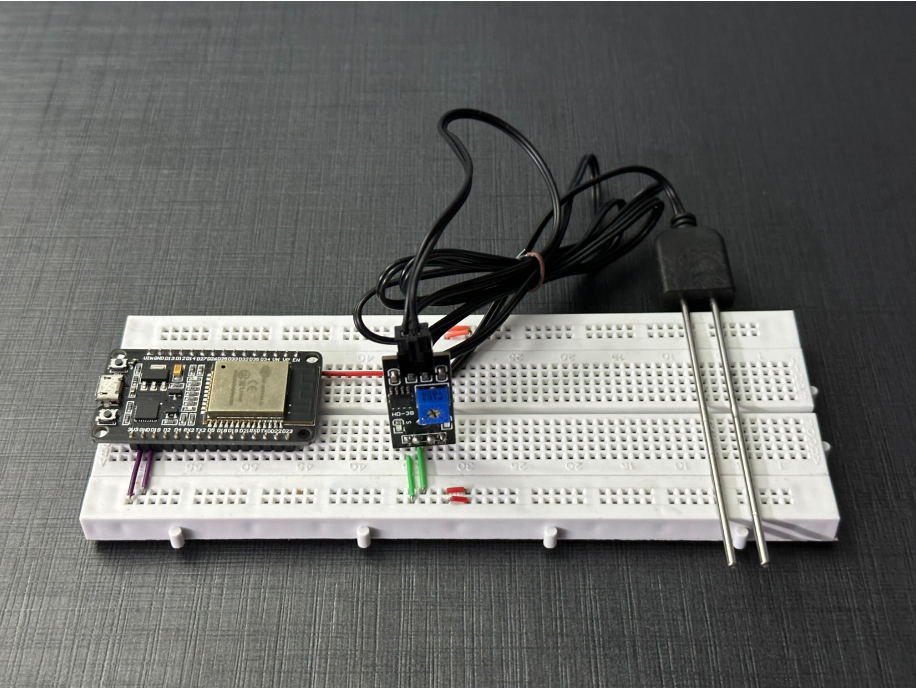
The following connections are made in order to complete the circuit setup:

From ESP32 to LDR module:

ESP32 LDR
3V3 VCC
GND GND
D33 A0

4. Interfacing the LDR sensor module using EzloPi Web Flasher

1. Set up your device/hardware by visiting config.ezlopi.com
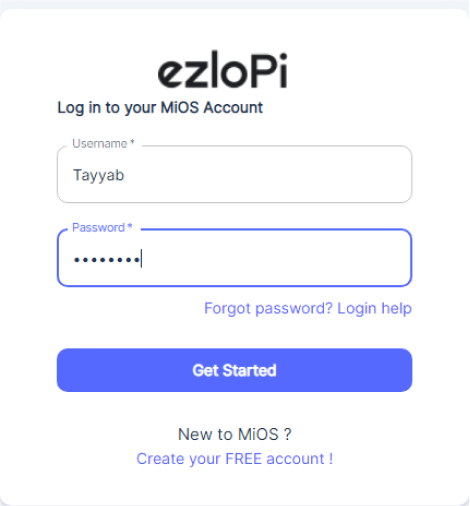
  1. Log in using the credentials which you just set earlier while signing up.
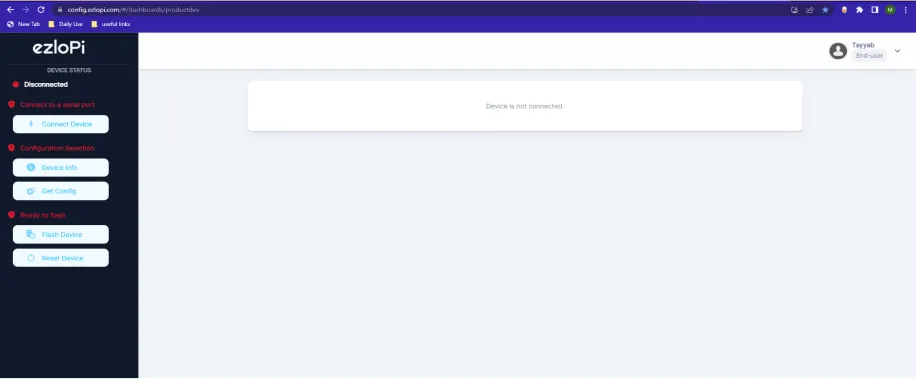
  1. Now, click on the Connect Device button and a pop-up window will appear.
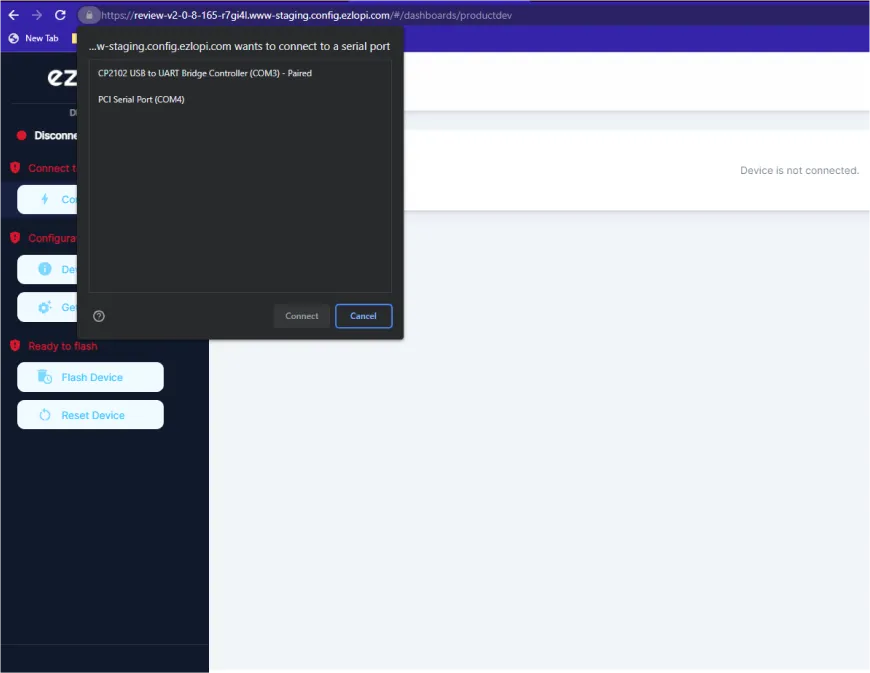
  1. Now, select COM Port to which your ESP32 device is connected. In our case, the COM3 port is used.

Click Connect.
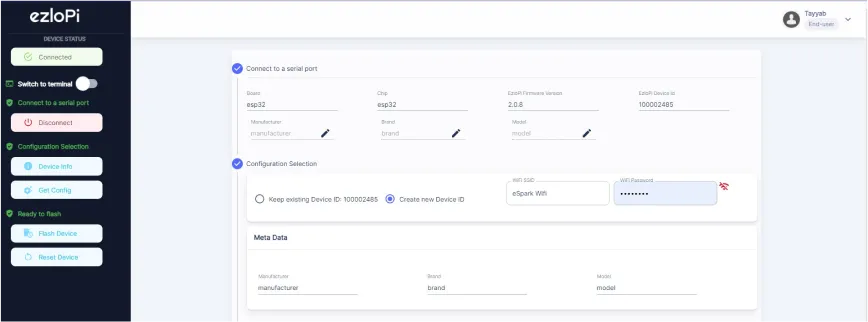
  1. If you are new to this and it's your first time configuring, select Create new Device ID. Enter Wifi SSID and Wifi Password.
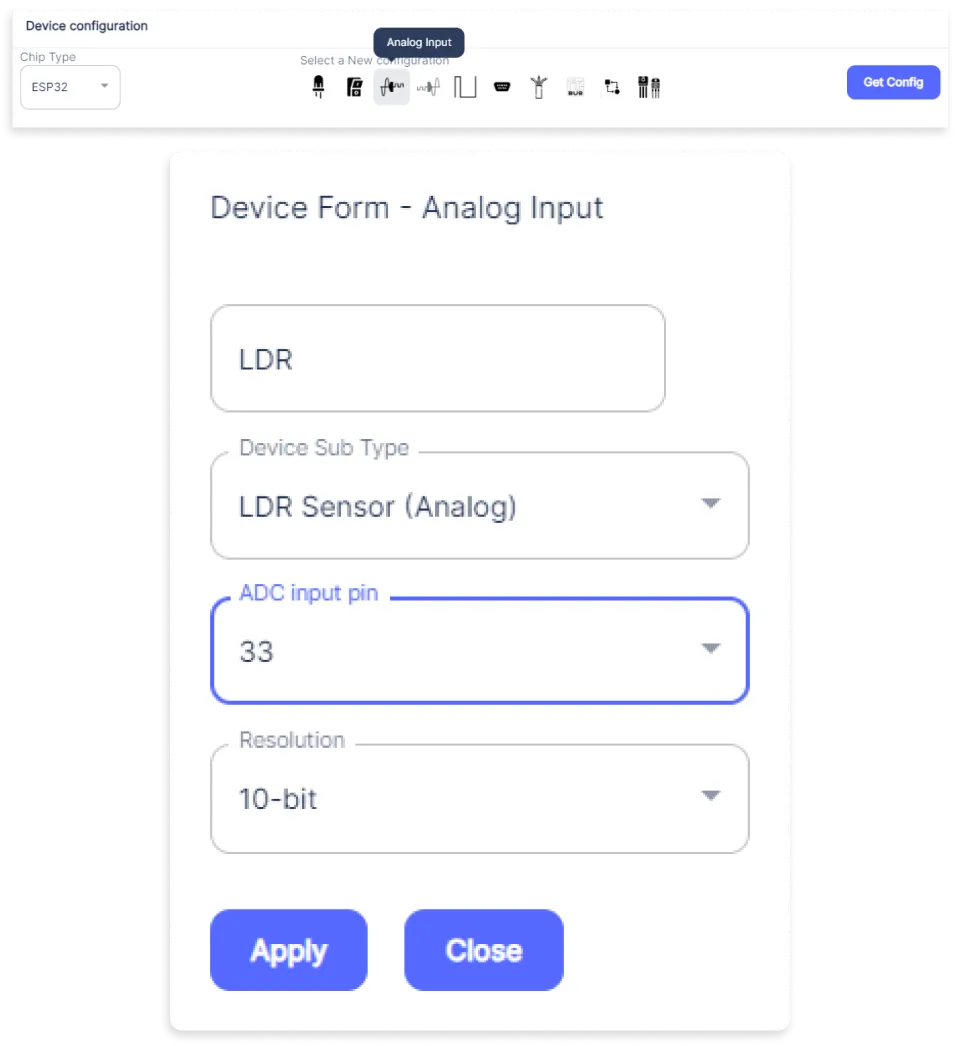
  1. In the Device Configuration, tab click on Analog Input.
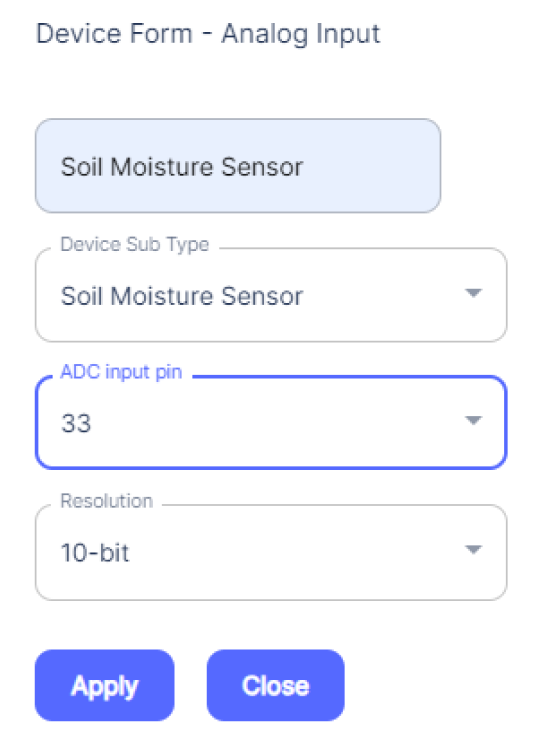
  1. A Digital Input window will open for inputting the following parameters:
  • An Analog Input window will open for inputting the following parameters:
  • Set a Device name of your choosing. In our case, we set it to LDR.
  • Set Device subtype to LDR Sensor (Analog).
  • Set OUT GPIO to 33.
  • Set Resolution to 10-bit.
  • Then Click Apply Button.
  • After clicking the apply button you can see a table of your setting in the device configuration tab.
  • Press the Flash Device button.
  1. A window will appear on the bottom right side of the screen displaying “Please press BOOT button while flashing begins.”
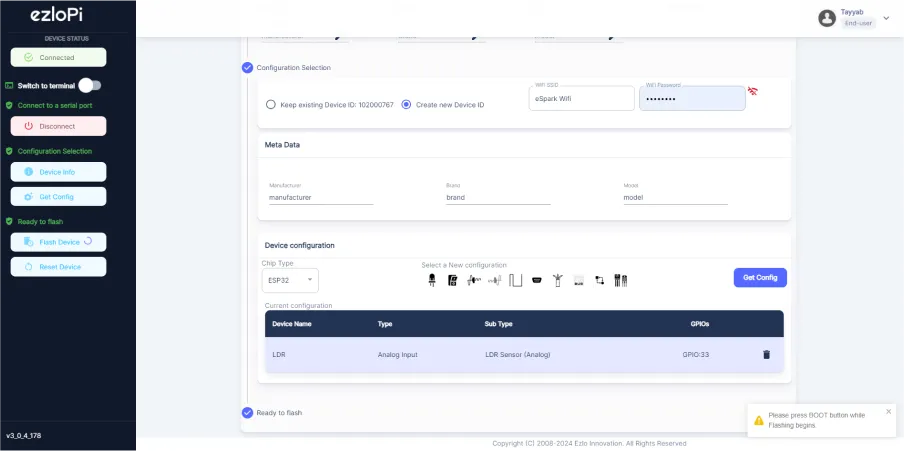
  1. Hold the BOOT button down until the next window appears on the bottom right side of the screen which says “Installation prepared. Please release the boot button now.”
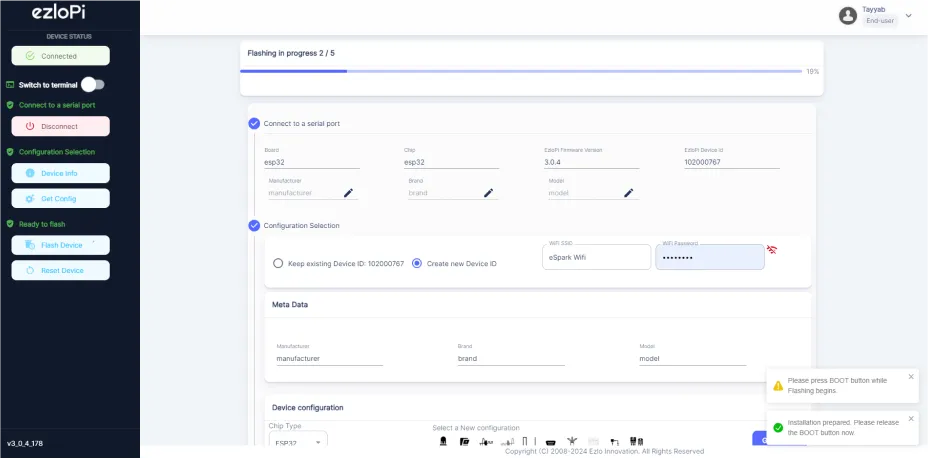
  1. Release the BOOT button from your ESP32 when this pop-up on the bottom right window appears.
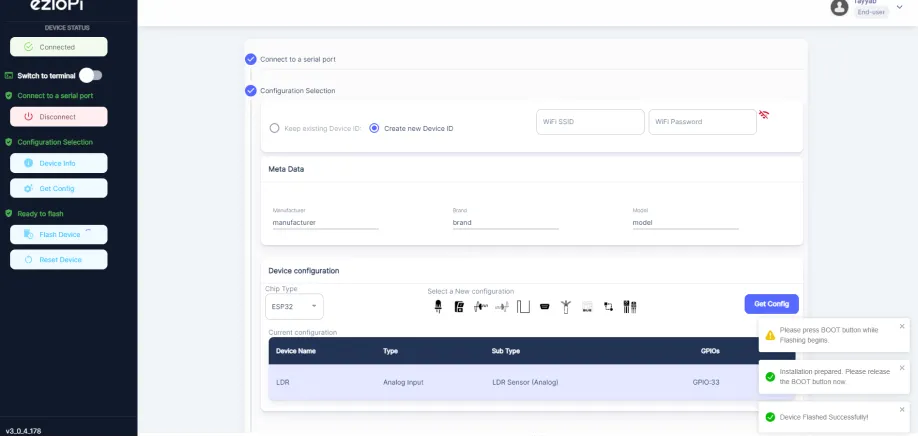
  1. After some time, a popup will appear saying Device Flashed Successfully! This means that your device has been set up successfully.

5. MiOS App

You can download the MIOS Android app from the Google Play Store and Apple App Store.

Google PlayApple App Store

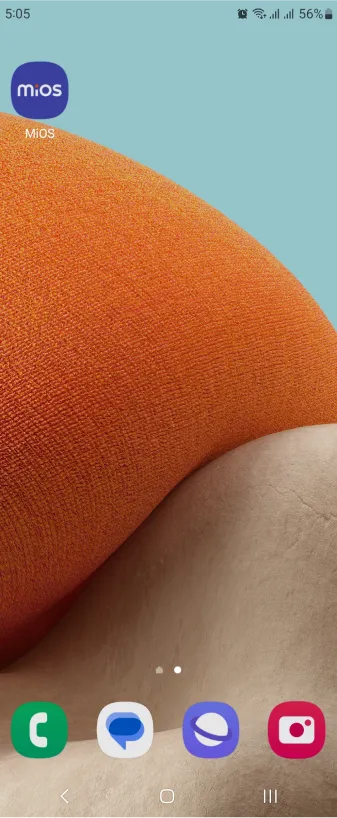
  1. After downloading the app, proceed to install the application and open it.
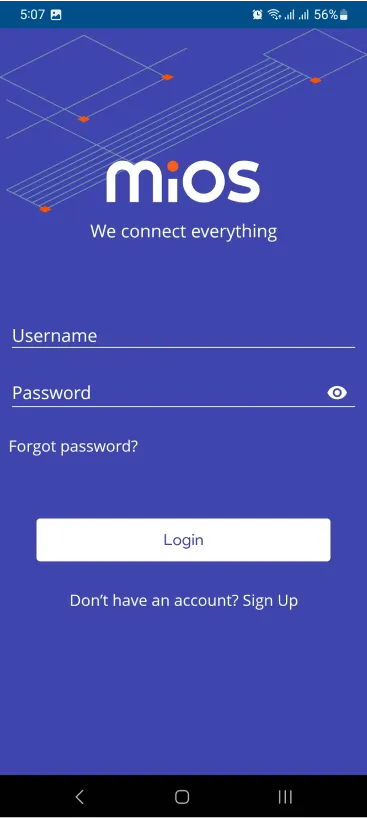
  1. Using the MIOS mobile application, create a new Ezlo Cloud account using the sign-up option. If you already have an account, you may proceed to log in.
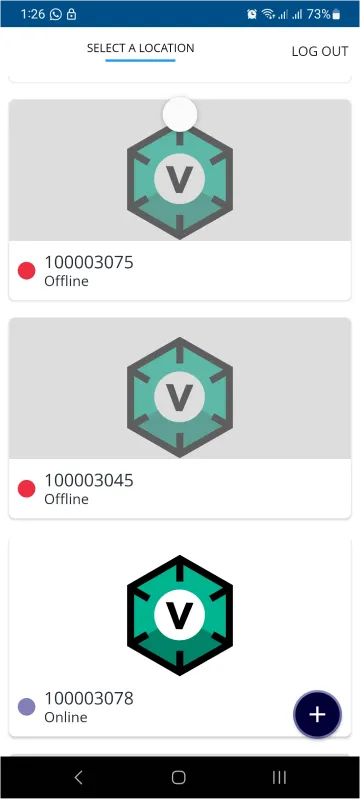
  1. After successfully logging in, you will be able to see the number of controllers connected such as a lamp, fan, or any other device in the MiOS app. Tap on any controller of your desired ID:
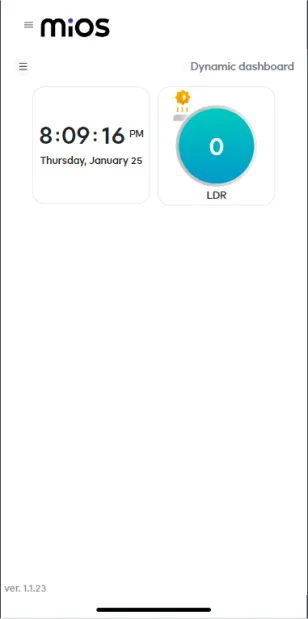
  1. You will be able to see the status of your controller whether it is online or offline. Access the device dashboard, and tap the device. The following view of the dashboard will appear:
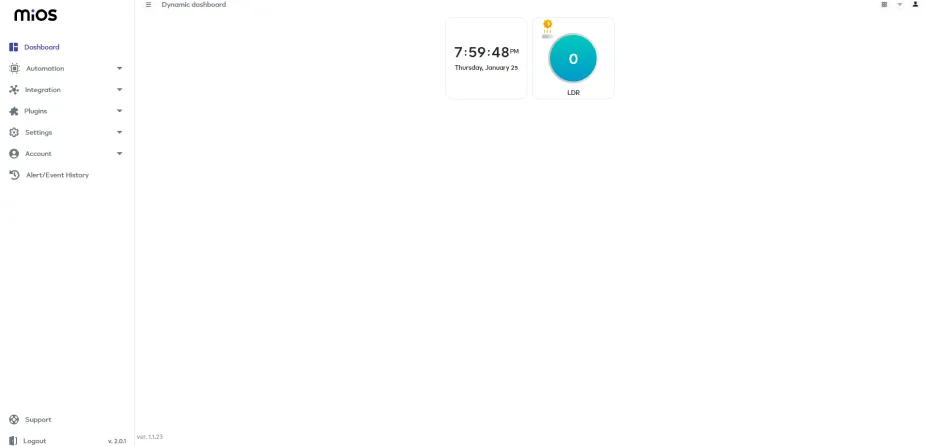
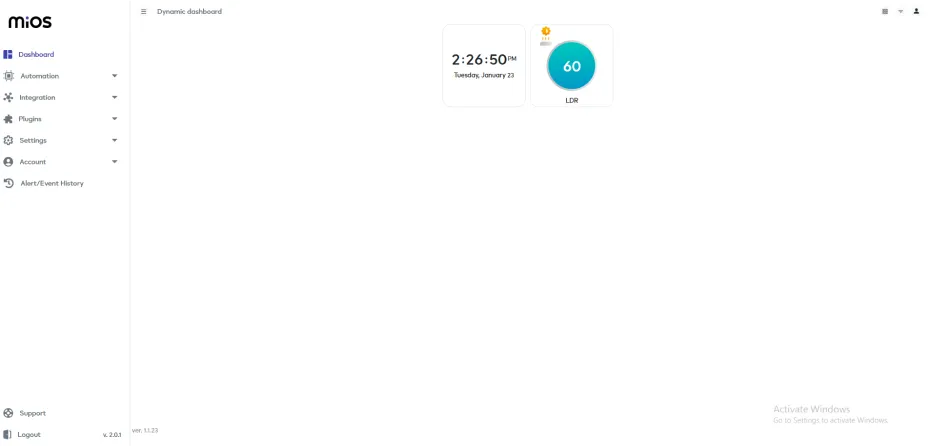
  1. After opening the mobile dashboard, you will be able to see the tile of your connected device. The LDR module is currently showing that at the time no amount of light is incident on the sensor so it is showing as ‘0’ value.
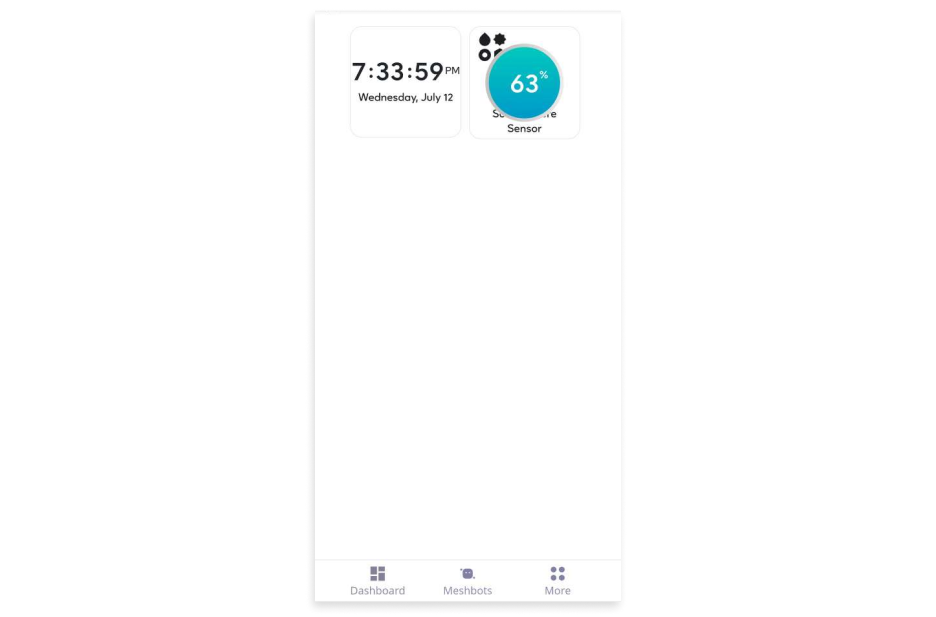
  2. When light is incident on the sensor, it will have analog values proportional to the incident light.

6. MiOS Web Application

  1. After configuring the controller with the EzloPi web flasher, head to ezlogic.mios.com
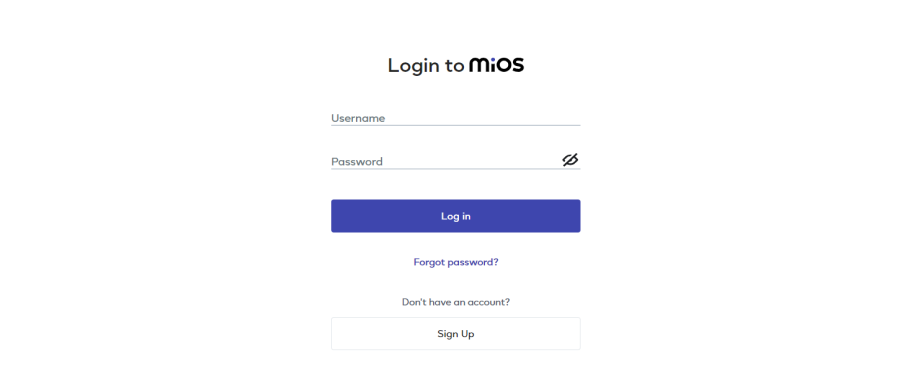
  1. Use the same credential to log in that you used for configuring the controller with the web flasher.
  1. After opening the MiOS web dashboard, you will be able to see the tile of your connected device. The LDR module is currently showing that at the time no amount of light is incident on the sensor so it is showing as ‘0’ value.
  1. Similarly, when more light is incident on the sensor, LDR’s value will increase.
Buy Components

eZlopie Products A single-channel 5V relay module $00.00

eZlopie Products Momentary switch $00.00

eZlopie Products Level Shifter Module (BSS138) $00.00

eZlopie Products ESP32
$00.00

eZlopie Products AC Lamp and Holder
$00.00