Open Source IoT Development Platform
v3.0.4B175
v3.0.4B176
v3.0.4 B177
v3.0.4B178
v3.0.4B179
v3.0.4B180
V3.1.4B181
V3.2.5B182
Requirements
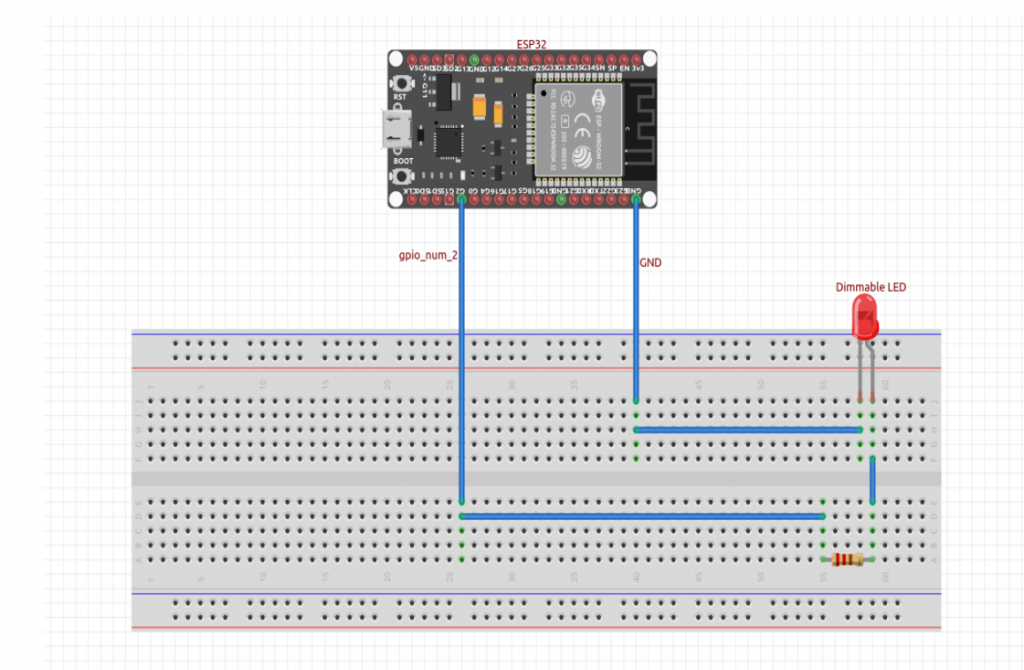
Circuit connection in ESP32
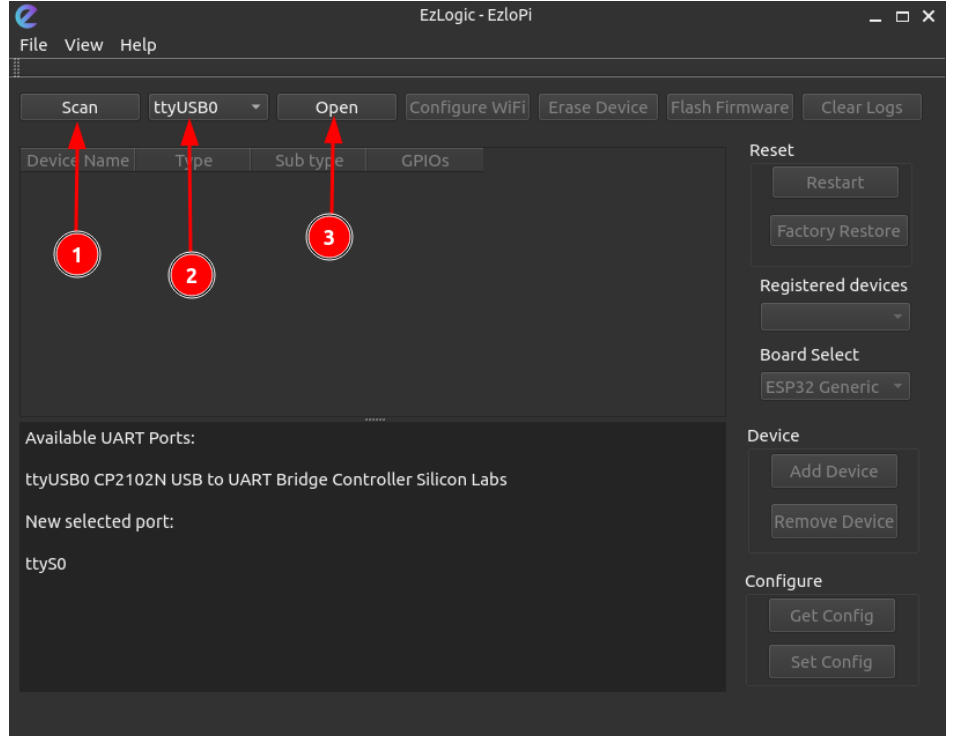
Adding dimmable LED from EzloPi desktop application
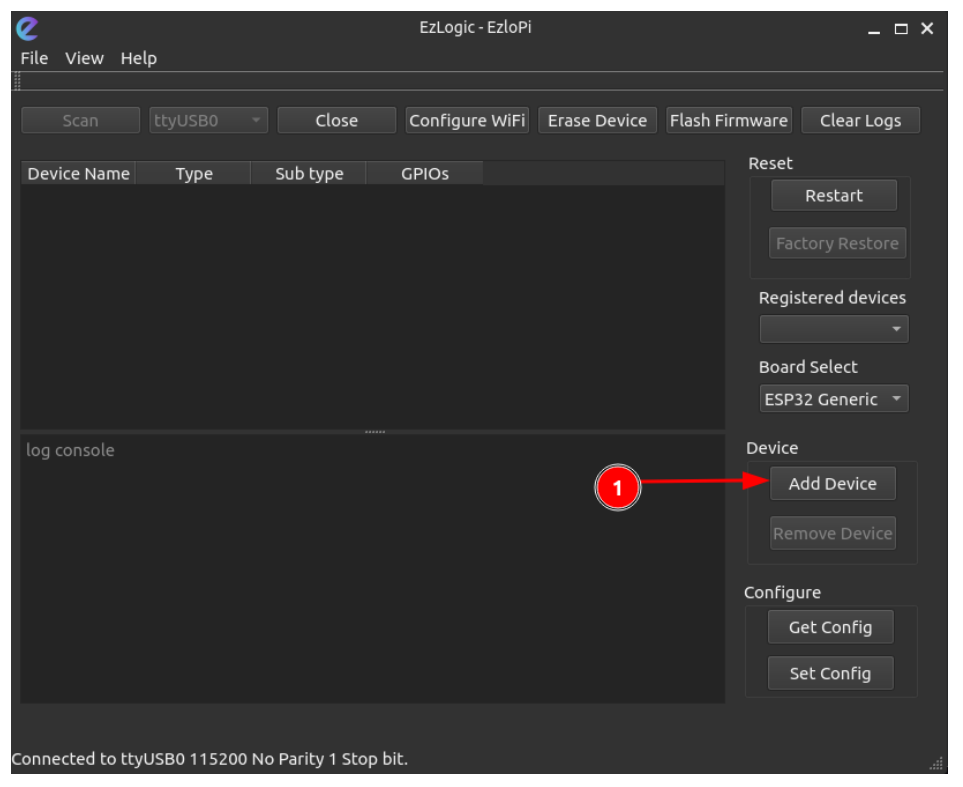
3. Click on the ‘Add Device’ button as shown below.
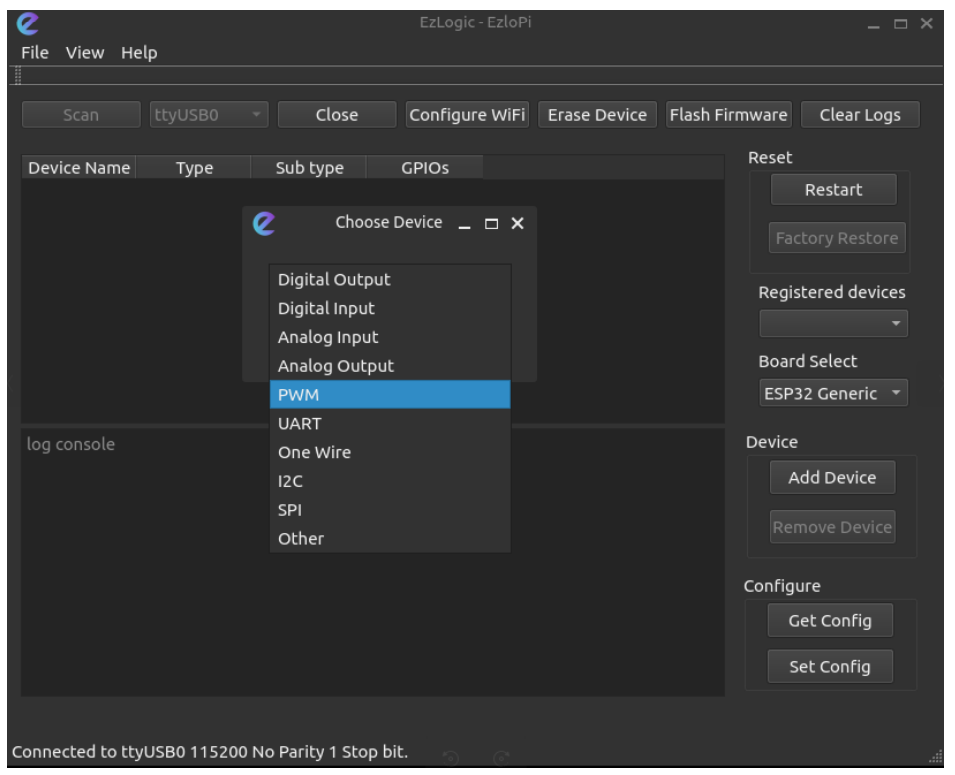
4. Select ‘PWM’ option from the dropdown menu.
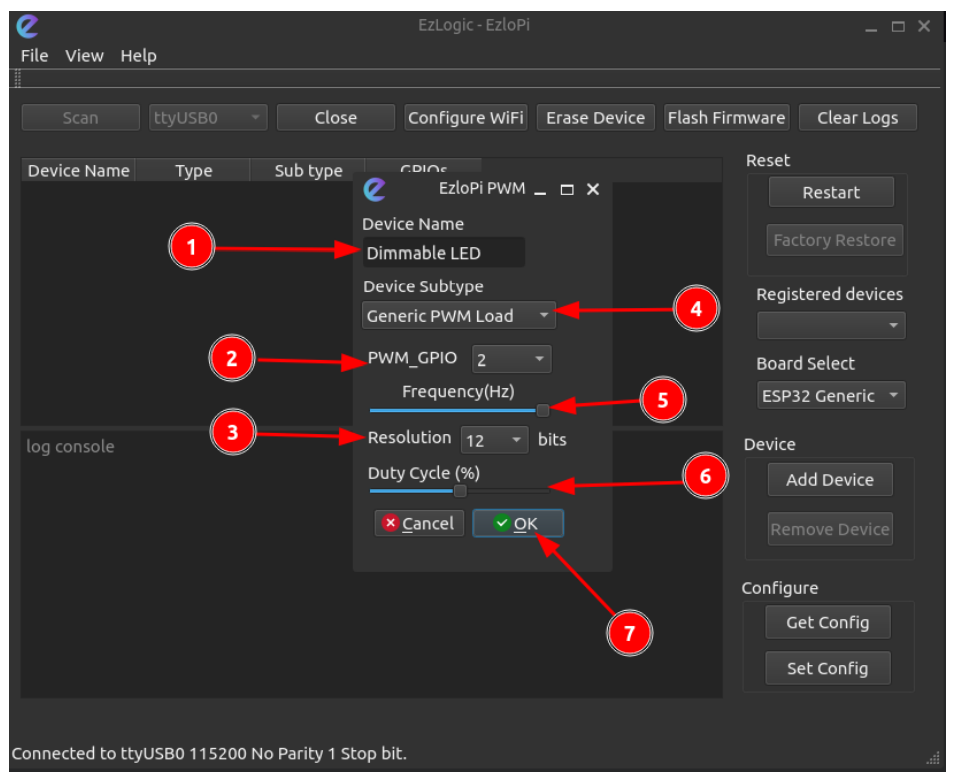
5. Configure the LED:
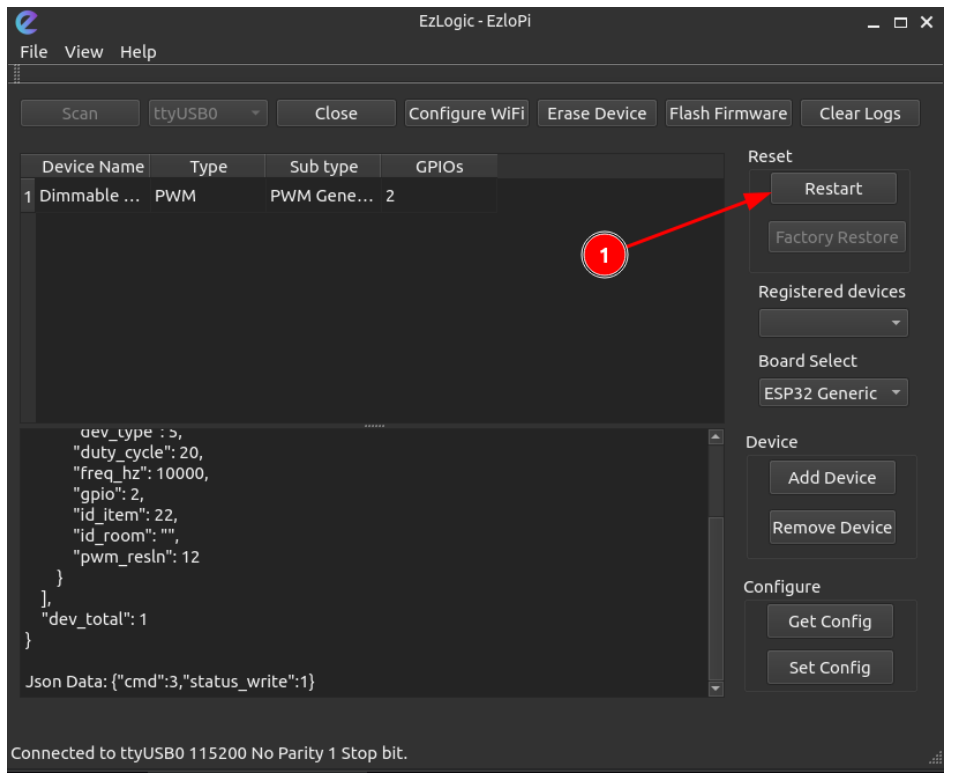
6. Device name, type, subtype and GPIOs are displayed in the screen; click on “set config” to burn the configurations to the ESP devices.
7. Finally, reset the device by clicking on “Reset”.
Dimmable LED in Vera Mobile Application
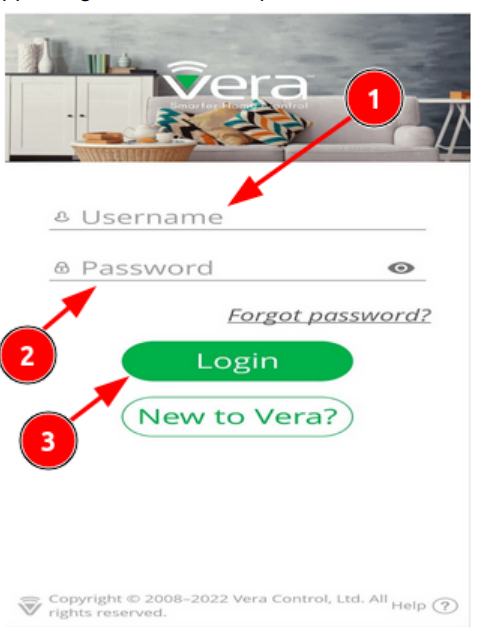
Login to the Vera app using username and password.
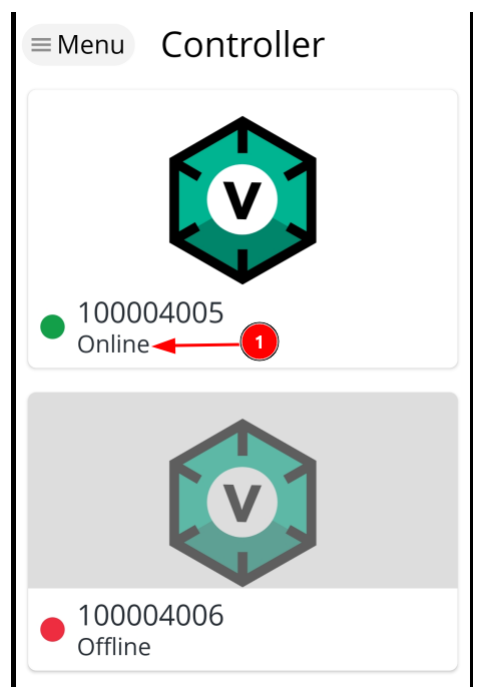
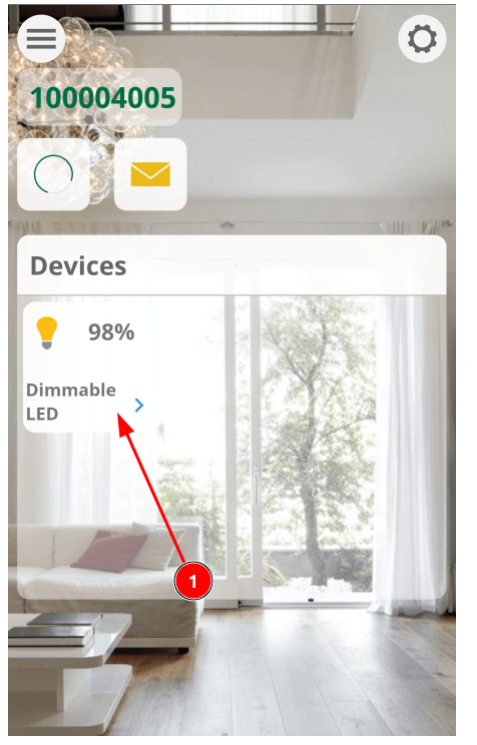
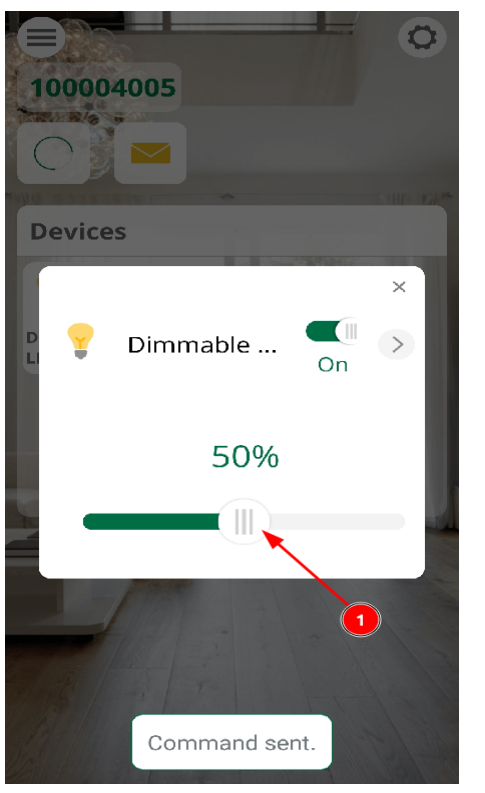
1. Identify the device with dimmable LED and click to connect to the device; wait while loading.
2. The dimmable LED connected will be shown in the ‘Devices’ panel.